
Step 3 — Become familiar with the MAPDL interface
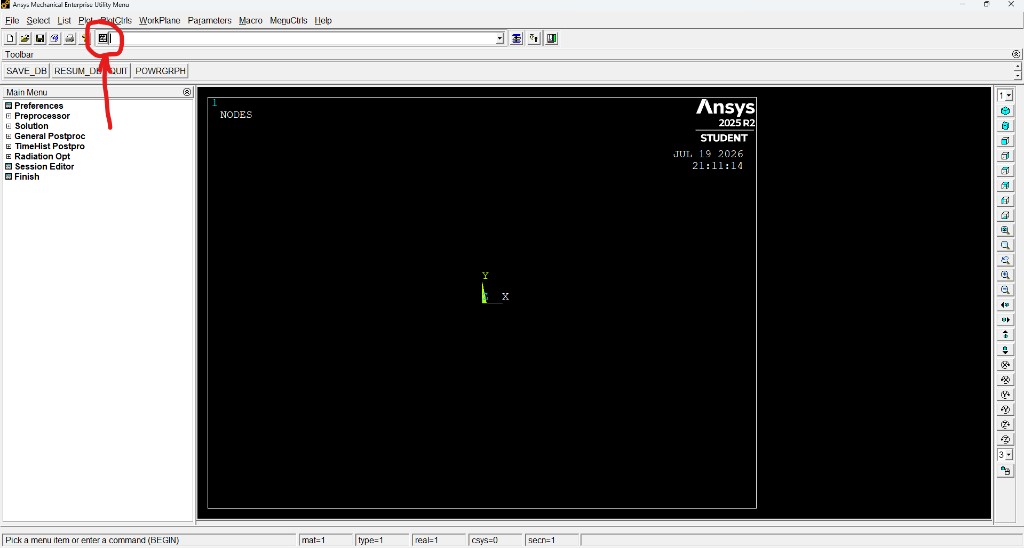
Before running, take a minute to locate the main window and the Output Window:
Main window
Five zones you'll use in almost every session:
- Command Input: top box where you can write an instruction.
- Main Menu: side tree with preprocessing, solution and postprocessing.
- viewport graphic area where geometry, mesh and results will appear.
- active processor in the bottom bar you will initially see
BEGIN. - Active Attributes:
mat,type,real,csysandsecnum.
Output Window
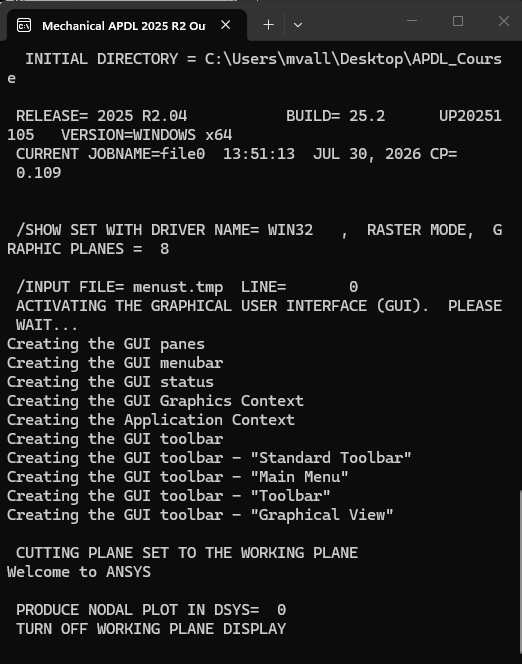
When you open MAPDL, a separate window entitled Mechanical APDL … Output. It is not where you type commands; it is the live log of everything the program writes — version and working directory, job name, graphical interface startup, command echo, solver progress, warnings, and errors.
On Windows, interactive MAPDL displays that output in the Output Window, but does not write it
to disk by default. To retain the log in a file, redirect it with
/OUTPUT,Fname,Ext or use the toolbar menu
Utility Menu → File → Switch Output to → File). In M00 it is not necessary to do it by hand:
/OUTPUT,m00_session,out is already included in the template, immediately
after /FILNAME.
The output file name must not match the job prefix. Because
/FILNAME sets m00_cantilever, and ANSYS reserves
m00_cantilever.out for the job, the template writes the execution log to the
alternative file m00_session.out.
While running, the Output Window remains the first place to spot an error; the
.out file lets you review the same content afterward.
BEGIN does not mean “without context”
BEGIN is the initial level of MAPDL: the session has just opened and you have not yet entered
no specific processor. A processor is the mode of work that determines what
APDL commands accept MAPDL at that time. Think of it as a phase of the analysis: not every
commands are valid in all phases.
The processors you'll use most often are four:
| Processor | Input (APDL) | What do you do on there? |
|---|---|---|
PREP7 |
/PREP7 |
Define geometry, materials, element types, mesh, and boundary conditions. |
SOLUTION |
/SOLU |
Declare the type of analysis and run SOLVE. |
POST1 |
/POST1 |
Read results and represent a spatial field in a set: contours, deformed, point listings. |
POST26 |
/POST26 |
Read results and represent a magnitude through several sets: load-response curves or temporal histories. |
POST1 and POST26 are complementary postprocessors: you enter one or the other after solving,
depending on whether you want to inspect a field in an instant or an evolution between sets. M00 template only uses
POST1; /POST26 you'll see it in M07.
To enter, type the command in Command Input and press Enter (or include it in a .mac).
To exit the current processor and return to BEGIN, use FINISH.
The bottom bar - the point 4 from the list above - shows where you are at all times; when running
the template you will see how it changes successively from BEGIN to PREP7,
SOLUTION and POST1.
The Main Menu of point 2 reflects the same logic: its preprocessing, solution and post-processing open those processors. In this course we will enter by APDL commands, not by menus.
Active attributes: defining is not activating
MAPDL uses numbered tables. ET,1,... defines the element type 1 and
MP,...,1,... defines the material 1. After TYPE,1 and MAT,1
turn them into active attributes for the elements to be created.
Pattern we will reuse: define → enable → assign when creating or meshing.
Step 4 — Undock the Command Window
Don't confuse the Output Window with the Command Window. The Output records all the session flow; the Command Window is optional and displays the interactive command dialog, immediate messages and responses. It can be integrated or decoupled depending on version and configuration.
Recommended settings during the course
Press the button indicated by the Red arrow in the previous screenshot to show the Command Window. If it is integrated into the interface, uncouple it and place it next to the viewport. It is not mandatory to solve, but it is highly recommended: you can follow the commands as execute and quickly detect the point at which a warning or error appears.
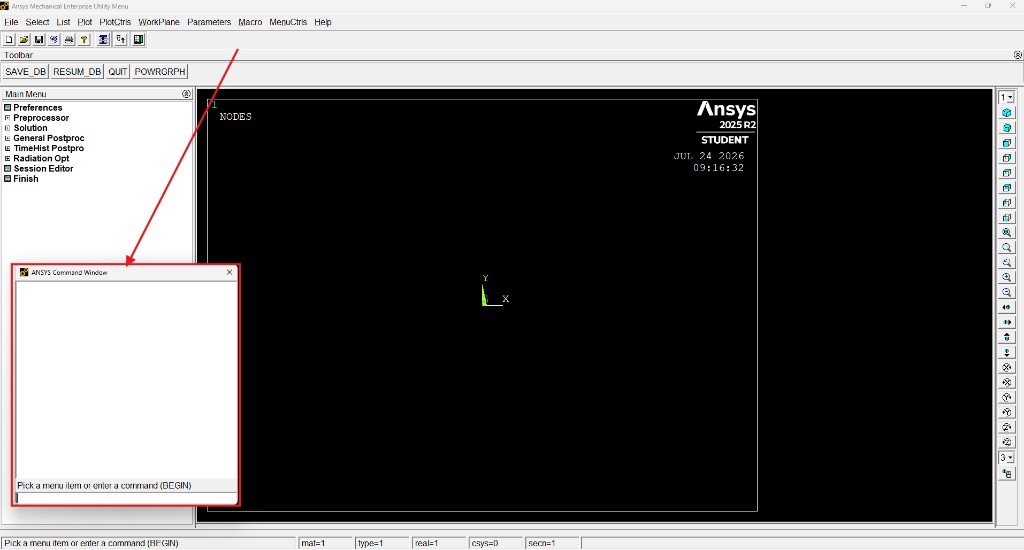
Use it as an interactive execution monitor, not as a substitute for on-disk recording. You don't need
read each line in real time or set up redirection by hand - template includes
/OUTPUT,m00_session,out pre-assigned and, in the end, a /OUTPUT without
arguments that returns the output to the Output Window in real time.